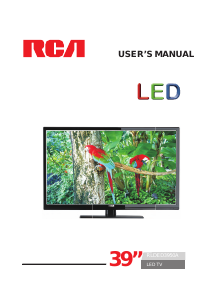
LED LCD TV
User's Manual
English
Part No.: RN0342R0121
MADE FOR TODAY
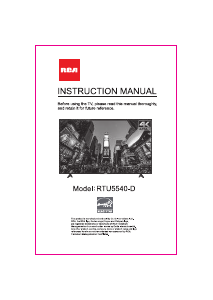
LED42C45RQ
MODEL
Date of Purchase
Please register your product at
www.rca.com
Please keep your sales receipt and keep the record of the serial number
and the date of purchase in order to receive warranty parts and service.
The serial number is located at the back of the TV.
Serial Number
Congratulations on your purchase! As you enjoy your new product,
please keep these safety tips in mind :
The Issue
The home theater entertainment experience is a
growing trend and larger flat panel displays and
popular purchases.
However, flat panel displays are not always supported
on the proper stands of installed according to the
manufacturer’s recommendations.
Flat panel displays that are inappropriately situated
on dressers, bookcases, shelves, desks, speakers,
chests or cats may fall over and cause injury.
1 2 2 3
Wall Mounting :
IF YOU DICIDE TO WALL MOUNT YOUR FLAT PANEL DISPLAY, ALWAYS :
- Use a mount that has been recommended by the display manufacturer and/or listed by an independent
laboratory (such as UL,CSA,ETL).
- Follow all instructions supplied by the display and wall mount manufacturers.
- If you have any doubts about your ability to safely install your flat panel display, contact your retailer about
professional installation.
- Make sure that the wall where you are mounting the display is appropriate. Some block construction. If you are
unsure, contact a professional installer.
- A minimum of two people are required for installation. Flat panel displays can be heavy.
This Manufacturer Cares!
The consumer electronics industry is committed to
making home entertainment enjoyable and safe.
Tune Into Safety
- One size does NOT fit all. follow the manufacturer's
recommendation for the safe installation and use of
your flat panel display.
- Carefully read and understand all enclosed
instructions for proper use of this product.
- Don't allow children to climb on or play with
furniture and television sets.
- Don't place flat panel displays on furniture that can
easily be used as steps, such as a chest of drawers.
- Remember that children can become excited while
watching a program, especially on a "larger than life" flat
panel display. Care should be taken to place or install
the display where it cannot be pushed, pulled over, or
knocked down.
- Care should be taken to route all cords and cables
connected to the p
anel display so that they cannot be
pulled or grabbed by curious children.
Caution and Warning
!
CHILD
SAFETY
It makes A Difference How and Where
You Use Your Flat Panel Display
Child Safety Guide
CONTENTS
07
07
Channel Bar
08
Adjusting Volume
08
EPG (Electronic Program Guide)
08
Selecting Input Source
07
OSD Menu Operations
08
Turning On and Off
Choosing TV Channel
Basic Operations
Child Safety Guide
02
Caution and Warning
02
Safety Precautions
04
Cable Connections
05
Side Panel Connections
05
Connecting AV Composite video device
05
TV Signal Connection
05
Connecting YPbPr Component device
06
Keypad and Front Panel
07
Connecting HDMI device
06
Keypad Buttons
07
How to obtain various kinds of Input Sources
06
Front Panel
07
TV Jacks Explanation
06
Check Accessories
05
Setup TV Table Stand
05
Select TV Location
05
Preparation for Your New TV
05
Connection and Using
05
07
¡Muchas gracias por su uso del presente producto!
Cuando usted disfruta de su nuevo producto, por favor tenga
en cuenta los consejos de seguridad:
Posibles Problemeas
- La experiencia de entretenimiento de cine en casa
es una tendencia creciente y los grandes monitores
de pantalla plana son muy populares.
embargo, los monitores de pantalla plana no se
han instalado siempre en los soportes adecuados o
instalado de acuerdo con las recomendaciones de
fabricante.
- Los monitores de pantalla plana que se han
instalado inadecuadament en tocadores, estanterías,
estantes, escritorios, oradores, baúle s o carros se
pueden caer y causar el daño corporal.
Montaje de Pared:
SI USTED DECIDE A MONTAR SU MONITOR DE PANTALLA PLANA LA PARED, SIEMPRE
- Use una montura que se ha recomendadop or el fabricante de monitor y/o listado por un laboratorio
independiente(como U L, CSA, ETL).
- Siga todas las instrucciones ofrecidas por eI fabricante de monitor y montaje de pared.
- Si usted tiene cualquier duda sobre su habilidad para instalar seguramente su monitor de pantalla plana,
contacte a su distribuidor para la instalación profesional.
- Compruebe que la
pared adonde se está montando el monitor es adecuada. Algunos montajes de la pared
no son diseñados para ser montados a paredes con tachones de acero o la vieja construcción de bloque de
ceniza. Si usted está inseguro, contacte a un instalador profesional.
- Por lo menos dos personas se requieren para la instalación. Los monitores de pantalla plana puede ser pesados.
¡Al Fabricante le Importa
- La industria electrónica del consumidor está
comprometida a hacer el entretenimiento de casa
agradable y seguro.
Ajustar Hasta Seguridad
- Un tamaño fijo NO es adecuado para todos. siga las
recomendaciones de fabricante para la instalación segura y
el uso de su monitor de pantalla plana
- Lea con cuidado y entienda todas las instrucciones
adjuntas para el uso propio de este producto.
- No permita a los niños a subir al equipo o jugar con
muebles y televisiones.
- No cloque los monitores de pantalla plana en el mueble
quese puede usar fácilmente como escalón, así como una
cómoda.
- Recuerde que los niños pueden llegar a ser excitados al ver
una programación, especialmente en el monitor de pantalla
plana "más grande que vida". El cuidado se tiene que
empezar por poner o instalar el moniotr donde no se puede
empujar, detener al castado del camino ni echar abajo.
-
El cuidado se tiene que empezar por encaminar todos
los cordones y cables conectados al monitor de pantalla
plana para que no se puedan tirar o agarrar conectados
al monitor de pantalla plana para que no se pueden tirar o
agarrar por los niños curiosos.
!
SEGURIDAD
DE NIÑOS:
El Cómo y Doónde Usted usar Su
Monitor de Panntalla Plana
Marca La Diferrencia
FCC Notice
Guía de seguridad para niños
Fcc Information
This equipment has been tested and found to comply with the
limits for a Class B digital device, pursuant to Part 15 of the FCC
rules.
These limits are designed to provide reasonable protection against
harmful interference in a residential installation.
This eq uip ment ge nerat es, uses and can radiate rad io
frequency energy and, if not installed and used in accordance
with the instructions, may ca use harmful interference to radio
Communications.
However, there is no Guarantee that interference will not occur in a
particular installation.
If this equipment does cause harmful inte
rference to radio or
television reception, which can be determined by turning the
equipment off and on, the user is encouraged to try to correct the
interference by one or more of the following measures:
- Reorient or relocate the receiving antenna.
- Increase the separation between the equipment and the receiver.
- Connect the equipment into an outlet on a circuit different from
that
to which the receiver is connected.
- Consult the dealer or an experienced radio/TV technician for
help.
Device complies with FDA radiation performance standards, 21
CFR subchapter.
Caution: (Invisible) Laser Radiation when open.
Do not stare into beam.
Choose Your Connections
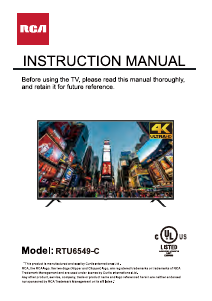
TV LED42C45RQ supports various connections to other devices
(such as DVD, VCR, Set-top box, etc.). Please f
ollow the table to
choose the cables which adapt to your device.
Note: HDMI, the HDMI logo, and High-Definition Multimedia
Interface are trademarks or registered trademarks of HDMI
Licensing LLC
Caution: Unplug the AC cord when you connect other devices to
TV.
Connecting AV Composite device
(Good Video Quality)
Composite connector will be shared with Component Y connector.
To connect a composite AV device, such as a DVD player, follow
these steps:
1.Connect the COMPOSITE jack on the side of TV to the video
output jacks of device via video cable (yellow).
2.Connect the L-AUDIO-R jacks on the side of TV to the audio
output jacks of device via audio cable.
Notice the left channel jack and plugs are white and the right
channel jack and plugs are red.
Note: AV signal belongs to composite video. This kind of video
signal has regular good display quality.
Composite Video Connection
The picture below is an example of a connection using the
composite video jack.
The first step in connecting your TV is obtaining the signal. Your
TV LED42C45RQ has a back panel, which allows you to receive
analog and/or digital television channels via ANT/CABLE jack.
Before connecting your TV, determine using an antenna or a cable
service to obtain the signal.
A. Antenna
Connect the antenna to TV via coaxial cable on ANT/CABLE jack
of the back panel. You are ready to receive air local digital
and
analog channels.
B. Cable TV service
Connect the cable TV wall jack to TV via coaxial cable on
ANT/CABLE jack of the back panel. You are ready to receive off-air
local digital and analog channels.
C. Set-Top Box
If you use a set-top box, you may need to call your cable company
or satellite service provider, which use a special connection, please
refer to the user’s guide of set-top box.
1. Read these instructions.
2. Keep these instructions.
3. Heed all warnings.
4. Follow all instructions.
5. Do not use this apparatus near water. For example, do not use
near a laundry tub, in a wet basement, or near a swimming pool,
and the
like.
6. Clean only with dry cloth.
7. Do not block any ventilation openings. Install in accordance with
the manufacturer’s instructions. Slots and openings in the cabinet
back or bottom are provided for ventilation, to ensure reliable
operation of the TV and to protect it from overheating. These
openings must not be blocked or covered. The openings should
never be blocked by placing the TV on a bed, sofa, rug, or other
similar surface.
8. Do not install near any heat sources such as radiators, heat
registers, stoves, or other apparatus (including amplifiers) that
produce heat.
9. Do not defeat the safety purpose of the polarized or grounding-
type plug. A polarized plug has two blades with one wider than the
other. A grounding-type plug has two blades and a third grounding
prong. The wide blade or the third prong is provided for your
safety. If the provided plug does not fit into your outlet, consult an
electrician for replacement of the obsolete outlet.
10. Protect the power cord from being walked on or pinched
particularly at plugs, convenience receptacles, and the point where
they exit from the apparatus.
11. Only use attachments/accessories specified by the
manufacturer.
12. Use only wi
th cart, stand, tripod, bracket, or table specified by
the manufacturer, or sold with the apparatus.
When a cart is used, use caution when moving the cart/apparatus
combination to avoid injury from tip-over.
A TV and cart combination should be moved with care. Quick
stops, excessive force, and uneven surfaces may cause the TV and
cart combination to overturn.
13. Unplug this apparatus during lightning storms or when unused
for long periods of time.
For added protection for this TV receiver during a lightning storm,
or when it is left unused for long periods of time, unplug it from the
wall outl
et and disconnect antenna or cable system.
This will prevent damage to the TV due to lightning and power line
surges.
14. Refer all servicing to qualified service personnel. Servicing is
required when the apparatus has been damaged in any way, such
as power-supply cord or plug is damaged, liquid has been spilled
or objects have fallen into the apparatus, the apparatus has been
exposed to rain or moisture, does not operate normally, or has
been dropped.
15. This TV should be operated only from the type of power supply
indicated on the rating label.
If customer is not sure the type of power supply in your home,
consult your appliance dealer or local power company.
For TV
remote control battery power, refer to the operating instructions.
16. The TV set shall not be exposed to dripping or splashing. No
objects filled with liquids, such as vases, shall be placed on the TV set.
HEAD PHONE:
Connect a 3.5mm headphone for personal audio.
USB:
Connect your USB storage device to enjoy music/photo files
on your TV. (Also used for service purpose).
COMPONENT Y/Pb/Pr: Connect a device that has component
video jacks, such as a DVD player. To access device connected
to the Y/Pb/Pr jack, press the INPUT button on your remote; then
press the up/down arrow to select Component. Press the OK
button at last to confirm.
Y
/Pb/Pr (Component Video):
They provide good picture quality
because the video signal is separated into three components. Use
three video-grade or component video cables for the connection.
When using Y/Pb/Pr, make sure you connect left and right audio
cables to the AUDIO IN R/L jacks.
L-AUDIO-R, COMPOSITE:
Connect an AV device that has
composite video jacks, such as a VCR or a DVD player. To access
device connected to these jacks, press the INPUT button on your
remote; then press the up/down arrow to select AV. Press the
OK button at last to confirm.
AUDIO IN L:
Left audio channel connection. The left audio
connector is usually white. For mono audio sources, be sure to
use the left AUDIO INPUT.
AUDIO IN R:
Right audio channel connection. The right audio
connector is usually red.
ANT/CABLE: Connect to r
eceive the signal from your antenna or
cable via coaxial cable.
Digital Audio out: Connect a coaxial cable for digital audio
output.
Connecting HDMI device
(Best Video Quality)
To connect a HDMI device, such as a DVD player, please Connect
the HDMI1/DVI/MHL, 2/ARC jack on the side of TV to the output
jacks of device via HDMI cable.
To connect a DVI device, via DVI port of PC or Device and HDMI
jack of TV:
Front Panel
Power/Standby Indicator: Light up in red when the TV is in
standby mode. Light out when the TV is on.
Remote Control Sensor:
Remote control IR sensor, which
receives infrared ray sent by remote control.
Codes for Cox Communications: 0178
Codes for Comcast: 10178
Codes for Dish Network: 627
Codes for Fios Verizon:
0205, 0057, 0493, 0775
Keypad Buttons
If you cannot locate your remote, you can use the keypad buttons
on your TV to operate many TV features.
Connecting YPbPr Component device
(Better Video Quality)
To connect a component device, such as a DVD player, follow
these steps:
1.Connect the COMPONENT IN Y/Pb/Pr jack on the side of TV to
the video output jacks of device via video cable (green, blue and
red).
2.Connect the L-AUDIO-R jacks on the side of TV to the audio
output jacks of device via audio cable.
Notice the left channel jack and plugs are white and the right
channel jack and plugs are red.
Note: Y/Pb/Pr jacks are component video. This kind of video s
ignal
has better display quality.
Component Video Connection
The picture below is an example of a connection using the component
video jack.
17. Never push objects of any kind into this TV through openings
as they may touch dangerous voltage or other electrical parts that
could result in fire or electric shock. Never spill liquid of any kind into
the TV.
18. Unplug the TV from the wall outlet before cleaning. Do not use
liquid or aero cleaners. Use a damp cloth for cleaning.
19. This TV should never be placed near or over a radiator or heat
resource. This TV should
not be placed in a built-in installation such
as a bookcase or rack unless proper ventilation is provided or the
manufacturer's instructions have been adhered to.
20. Do not place this TV on an unstable cart, stand, tripod, bracket,
or table. The TV may fall, causing serious injury to someone, and
serious damage to the appliance.
21. Do not attempt to service this TV by yourself because opening
or removing covers may expose you to dangerous high voltage or
other hazards. Refer all servicing to qualified service personnel.
22. This device complies with Part 15 of the FCC Rules. Operation
is subject to the following
two conditions: (1) this device may
not cause harmful interference, and (2) this device must accept
any interference received, including interference that may cause
undesired operation.
23. WARNING: To prevent injury, this apparatus must be securely
attached to the floor/wall in accordance with the installation
instructions.
24. To reduce the risk of electric shock, the grounding of center pin
of plug must be maintained.
25. If an outside antenna or cable system is connected to the TV,
be sure the antenna or cable system is grounded to provide some
protection against voltage surges and built-up static charges.
Section 81
0 of the National Electrical Code, ANSI/NFPA NO.70,
provides information with respect to proper grounding of the mast
and supporting structure, grounding of the lead-in wire to an
antenna discharge unit, size of grounding conductors, location of
antenna discharge unit, connection to grounding electrodes, and
requirements for the grounding electrodes. (See figure A)
54
5 6
6 7
Safety Strap
Caution: Pushing, pulling or climbing on the TV may cause the TV
falling. Do not let children climb or hang on the TV. Always place the
TV on a sturdy, level, stable surface that can hold the weight of TV.
And if possible, secure the TV according to the instruction below
(Note: The fastening components such as screws are not supplied
with TV).
Step one: Insert the M6 mounting screws into the upper two wall
mounting screw holes and fasten them (Figure B).
Step two: Insert anchors to wall and connect the bolts and anchors
with ropes or chains (Figure C).
Before Turning On TV
Check Accessories
Check the accessories that are packed with your TV.
(refer to Quick Start Guide)
Setup TV Table Stand
Please refer to Quick Start Guide to carry out stand installing.
Select TV Location
Select a flat, stable table to place your TV set. Please follow the
safety instructions when placing the TV.
Connection and Using
After placing your TV properly, you can connect the TV with power
supply and cable components. For further information, see page 5
to page 6.
1. Connect the HDMI1/DVI/MHL jack on the side of TV to the DVI
port of PC via HDMI-DVI cable.
2. Connect the L-AUDIO-R jack on the side of TV to the audio
output jack of computer with audio cable (dual-channel RCA jacks
to 3.5mm
stereo jack or the L-AUDIO-R jack).
Note: 1. HDMI (High-Definition Multimedia Interface) is a compact
audio/video interface for transmitting uncompressed digital data. It
carries the audio and video signal via the same cable and has the
best display quality.
2. HDMI-DVI cable transfers only video signal from DVI port of
DVI device to HDMI jack of TV. For audio signal, please connect
audio output to L-AUDIO-R jack on TV back panel.
HDMI Connection
The picture below is an example of a connection using the HDMI
video jack.
Turning On and Off
Connect the AC cord to power the LED LCD TV. At this time the
TV will
enter standby mode and power indicator will turn red. Use
Power button ( ) on the top panel of TV or on the remote control
to turn on the TV. After switching off the TV for 5 seconds, you can
turn on TV again.
Choosing TV Channel
Tuning To Analog Channels
an analog channel has a channel number beginning with “A”.
Input the digital number with numeric buttons directly and press
OK button to confirm. For example, to watch analog channel “A51”,
press “5”, “1”, “OK” on remote control in sequence.
Note: Although there is no analog TV signal available in America,
we reserve ATV functions for some expansible use.
Tuning To Digital Channels
Selecting Input Source
Press IN PUT but ton on rem ote
cont
rol to display Source Select list.
Use up/down arrows to highlight the
source you need and press OK to
confirm.
About remote control
working distance and
angle, see the
start guide.
quick
Keypad and Front Panel
TV Jacks Explanation
Side Panel Connections
Cable Connections
Preparation for Your New TV
TV Signal Connection
Safety Precautions
Basic Operations
How to Obtain Various Kinds of Input Sources
After connection is done, press INPUT button on remote control
or TV top panel to choose the input source you need. See page 7,
Basic Operation of TV.
Displays the Source Select List.
Displays the TV Main Menu.
Scans up through the channel list.
In the TV menu system, it acts like the up arrow on the
remote control and can be used to select menu options.
Scans down through the channel list. In the TV menu
system, it acts like the down arrow on the remote
control and can be used to select menu options.
Increases the volume. In the TV menu system, it acts
like the right arrow on the remote control and can be
used to select menu options.
Decreases the volume. In the TV menu system, it acts
like the left arrow on the
remote control and can be used
to select menu options.
Turns the TV on and off.
Note: Do not plug the AC cord until you have accomplished all the
connections. This TV does not support QAM under cable channel
search.
To connect an ARC HDMI OUT device, please connect to the HDMI
input port of the device such as amplifier,
HDMI IN
HDMI1/DVI, 2: (High-Definition Multimedia Interface) It provides an
uncompressed digital connection that carries both video and audio
data by way of an integrated mini-plug cable.
MHL: (Mobile High-Definition Link) To standard HDMI input, transmit
the video/audio from portable electronic device (cellphone,digital
camera, digital-video camera) to TV set.
ARC: (Audio Return Channel)
Adopted in TV output of digital audio, can
be connected to the device supporting ARC, transmit the TV sound to the
device.
USB
Move
Select
OK
Remote Control Sensor
Power/Standby Indicator
6
6
08
08
11
13
09
08
12
14
09
08
14
10
10
Picture Menu
Adjust the OSD Screen
Frequently Asked Questions (FAQs)
Audio Menu
Quick Menu
Troubleshooting
Time Menu
Channel Menu
Setup Menu
Lock Menu
Warranty Card
Wall Mounting Unit Specification
USB Media Play
Product Specification
13
A digital channel has a channel number beginning with “D”. Input
the main digital number with numeric buttons directly, then press
“-” button on remote control, and input the sub number at last.
For example, to watch analog channel “D31-1”, press “3”, “1”, “-”,
“1”, “OK” on remote control in sequence.
Changing Channels Directly You can use CH button to increase
channel number and CH to decrease channel number.
When no OSD (On Screen Display) is used, the up/down arrows
can also work as CH /CH buttons.


Join the conversation about this product
Here you can share what you think about the RCA LED42C45RQ LED Television. If you have a question, first carefully read the manual. Requesting a manual can be done by using our contact form.