English
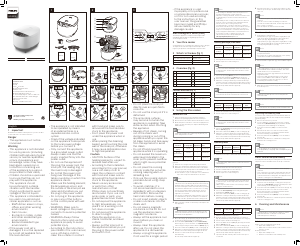
1 Important
Read this user manual carefully before you use the Rice
cooker and save it for future reference.
Danger
• The appliance must not be
immersed.
Warning
• This appliance is not intended
for use by persons (including
children) with reduced physical
sensory or mental capabilities,
or lack of experience and
knowledge, unless they have
been given supervision or
instruction concerning use
of the appliance by a person
responsible for their safety.
• Children should be supervised
to ensure that they do not
play with the appliance.
• This appliance should
be positioned in a stable
situation with the handles
(if any) positioned to avoid
spillage of the hot liquids.
• This appliance is intended to
be used in household and
similar applications such as:
• Sta kitchen areas in shops,
oces and other working
environments;
• Farm houses;
• By clients in hotels, motels
and other residential type
environments;
• Bed and breakfast type
environments.
• If the power cord set is
damaged, it must be replaced
by a cord set available from
the manufacturer.
• The appliance is not intended
to be operated by means
of an external timer or a
separate remote-control
system.
• Check if the voltage indicated
on the appliance corresponds
to the local power voltage
before you connect it.
• Only connect the appliance
to a grounded power outlet.
Always make sure that the
plug is inserted rmly into the
power outlet.
• Do not use the appliance if
the plug, the power cord, the
inner pot, the sealing ring, or
the main body is damaged.
• Do not let the power cord
hang over the edge of the
table or worktop on which the
appliance stands.
• Make sure the heating element,
the temperature sensor, and
the outside of the inner pot are
clean and dry before you put
the plug in the power outlet.
• Do not plug in the appliance
or press any of the buttons
on the control panel with wet
hands.
• WARNING: Make sure to
avoid spillage on the power
connector to avoid a potential
hazard.
• WARNING: Always follow
the instructions and use the
appliance properly to avoid
potential injury.
• According to the instructions
prescribed in this user manual,
use a soft damp cloth to
clean the surfaces in contact
with food and make sure to
remove all the food residues
stuck to the appliance.
• Don’t place the power cord
under the appliance when in
use.
• When placing the steaming
basket, avoid touching the side
wall of the inner pot, otherwise
it may cause deformation due
to high temperature.
Caution
• CAUTION: Surface of the
heating element is subject to
residual heat after use.
• According to the installation
prescribed in this user manual,
use a soft damp cloth to
clean the surfaces in contact
with food and make sure to
remove all the food residues
stuck to the appliance.
• Never use any accessories
or parts from other
manufacturers or that
Philips does not specically
recommend. If you use such
accessories or parts, your
guarantee becomes invalid.
• Do not expose the appliance
to high temperatures, nor
place it on a working or still
hot stove or cooker.
• Do not expose the appliance
to direct sunlight.
• Place the appliance on a
stable, horizontal, and level
surface.
• Always put the inner pot in
the appliance before you put
the plug in the power outlet
and switch it on.
• Do not place the inner pot
directly over an open re to
cook rice.
• Do not use the inner pot if it is
deformed.
• The accessible surfaces
may become hot when the
appliance is operating. Take
extra caution when touching
the appliance.
• Beware of hot steam coming
out of the steam vent
during cooking or out of the
appliance when you open the
lid. Keep hands and face away
from the appliance to avoid
the steam.
• Do not lift and move the
appliance while it is operating.
• Do not exceed the maximum
water level indicated in the
inner pot to prevent overow
which might cause potential
hazard.
• Do not place the cooking
utensils inside the pot while
cooking, keeping warm or
reheating rice.
• Only use the cooking utensils
provided. Avoid using sharp
utensils.
• To avoid scratches, it is
not recommended to cook
ingredients with crustaceans
and shellsh. Remove the
hard shells before cooking.
• Do not insert metallic objects
or alien substances into the
steam vent.
• Do not place a magnetic
substance on the lid. Do not
use the appliance near a
magnetic substance.
• Always let the appliance cool
down before you clean or
move it.
• Always clean the appliance
after use. Do not clean the
appliance in a dishwasher.
• Always unplug the appliance
if not used for a longer period.
1 2 3
User manual
http://www.philips.com/welcome
Register your product and get support at
http://www.philips.com/welcome
Warranty
Register your product and get support at
a
b
c
d
e
f
k
g
h
i
j
l
m
n
o
p
q
r
s
t
u
5
6
7
4
8
17 18 19
16
14
15
10
9
12
13
11
©2019 Koninklijke Philips N.V.
All rights reserved.
HD4515_33_UM_Indonesia_v1.0
HD4515
EN User manual ID Buku Petunjuk Pengguna
• If the appliance is used
improperly or for professional
or semiprofessional purposes,
or if it is not used according
to the instructions in this
user manual, the guarantee
becomes invalid and Philips
refuses liability for any
damage caused.
Electromagnetic elds (EMF)
This Philips appliance complies with all applicable
standards and regulations regarding exposure to
electromagnetic elds.
2 Your Rice cooker
Congratulations on your purchase, and welcome to Philips!
To fully benet from the support that Philips oers,
register your product at www.philips.com/welcome.
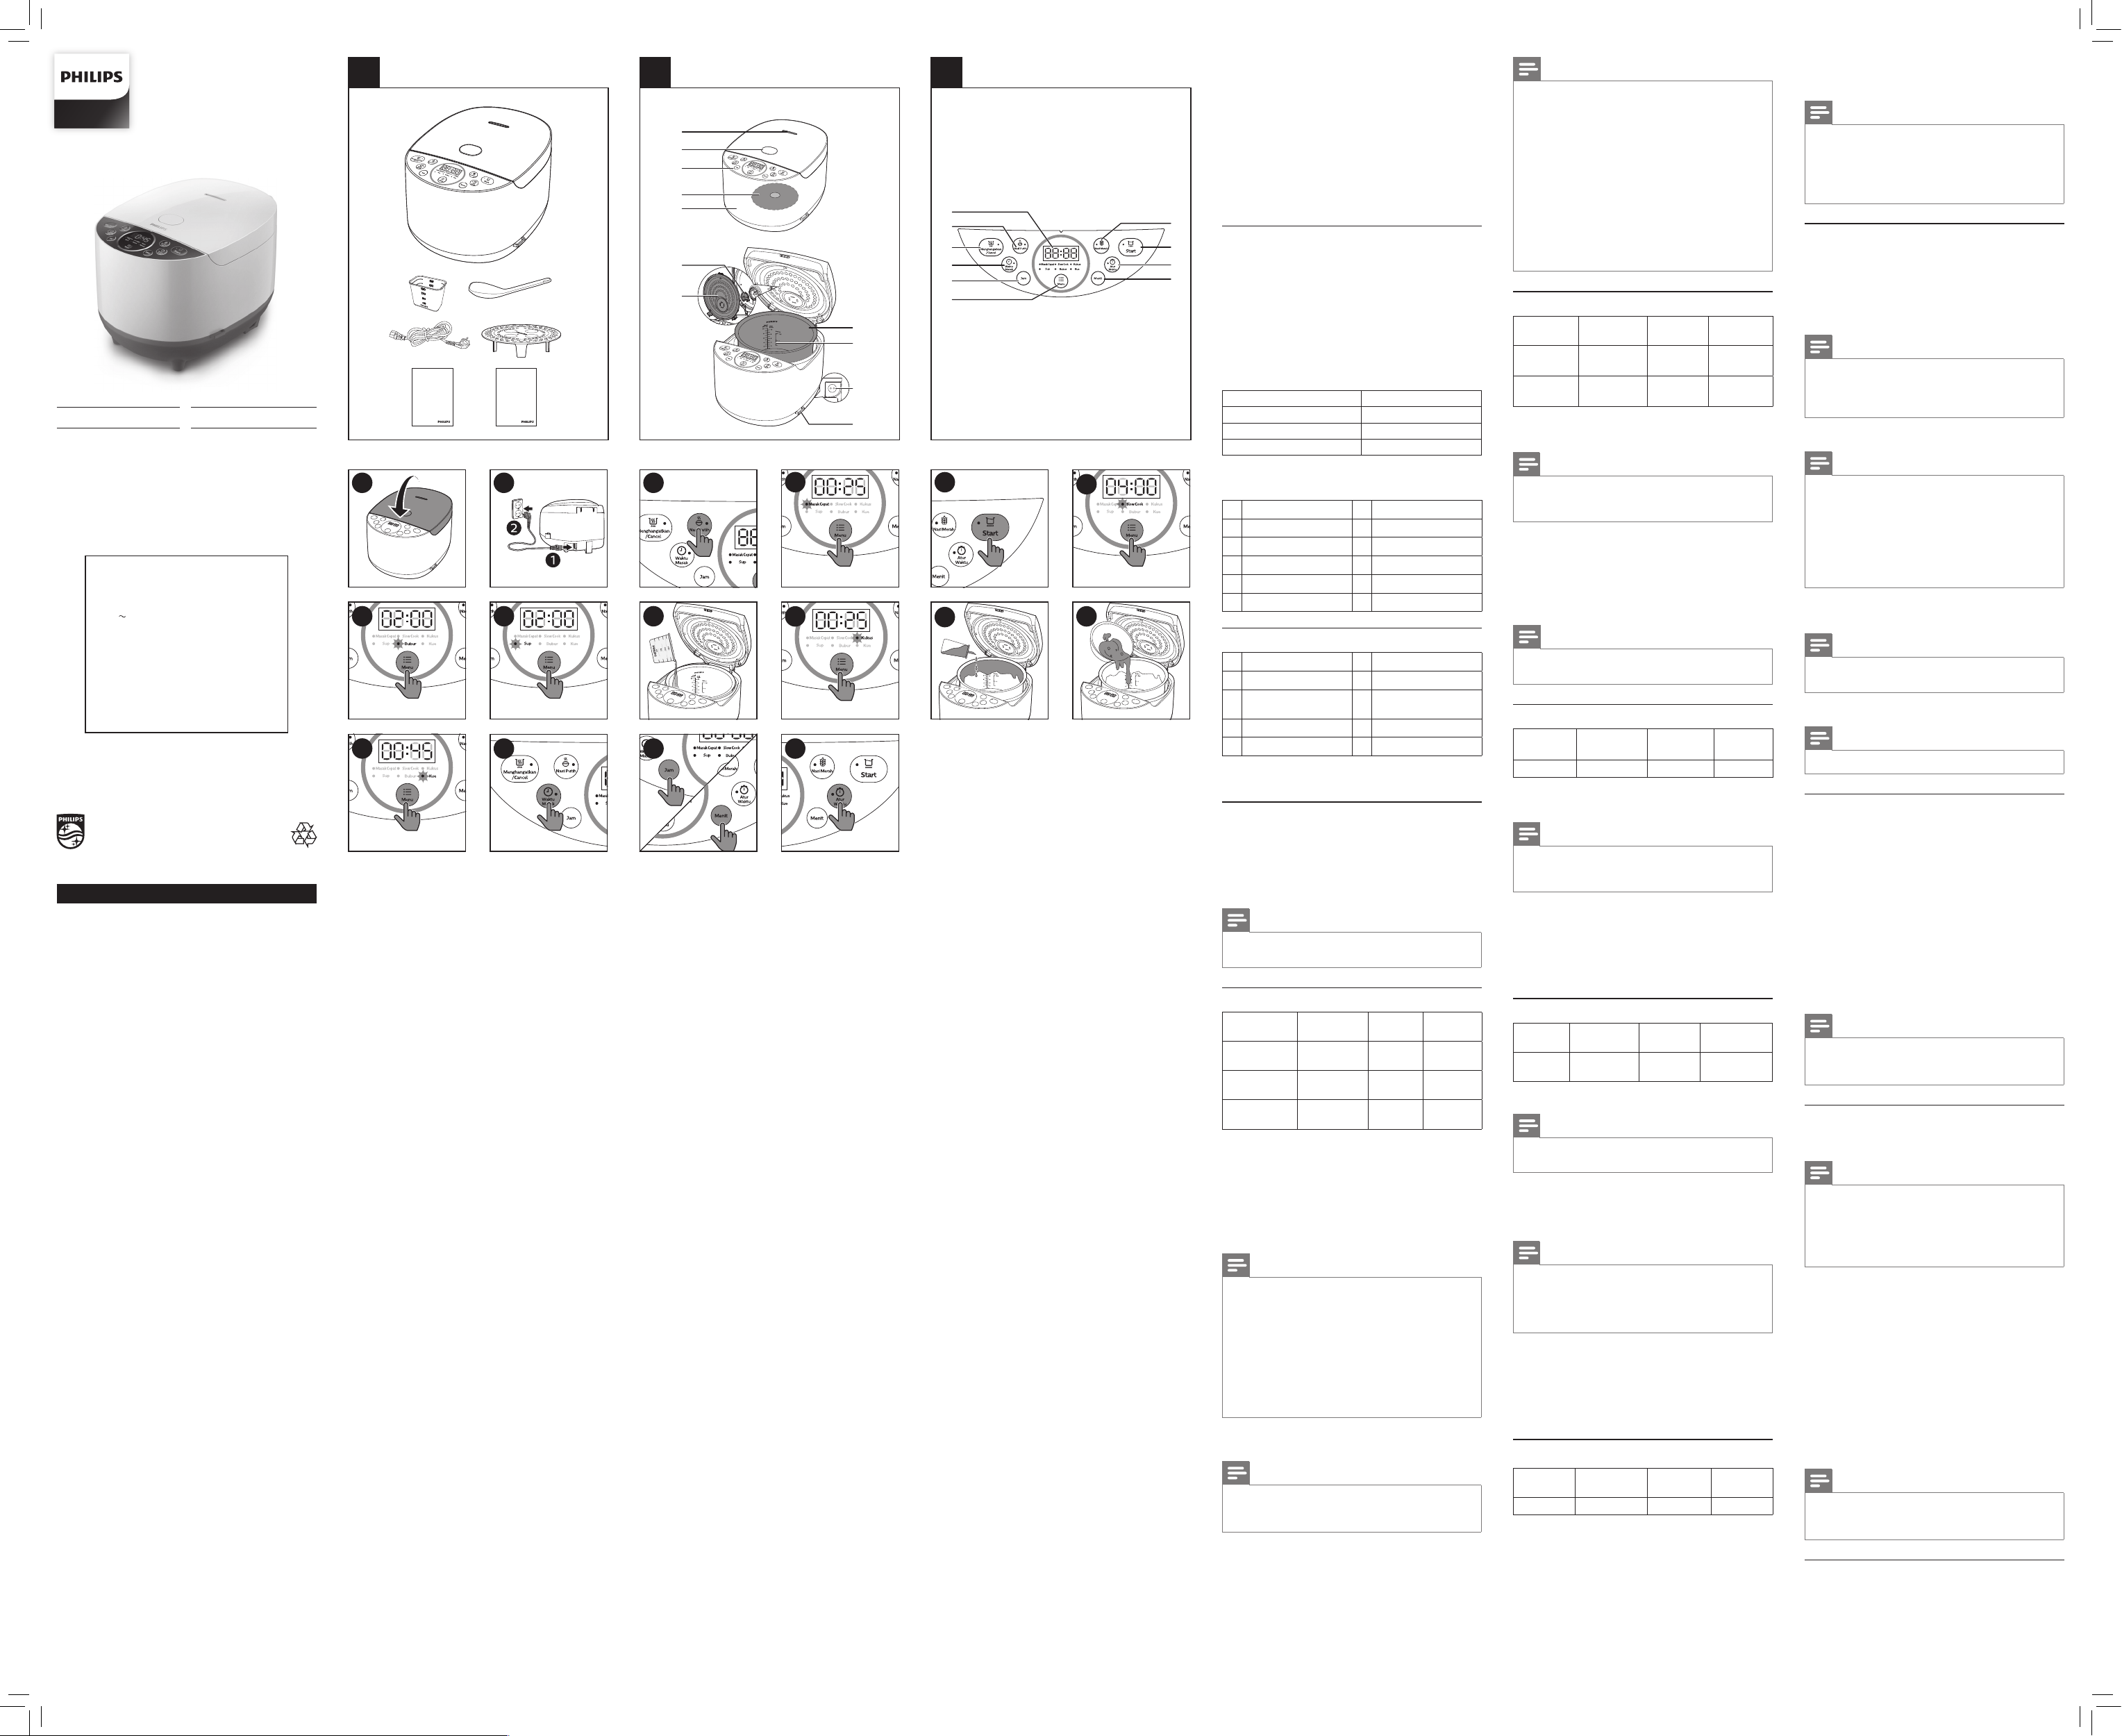
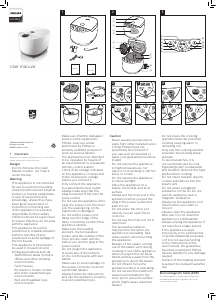
3 What’s in the box (fig. 1)
Rice cooker main unit Measuring cup
Rice and soup 2 in 1 spoon Power cord
Steaming basket User manual
Warranty card
4 Overview (fig. 2)
a
Steam vent
g
Detachable inner lid
b
Lid release button
h
Inner pot
c
Control panel
i
Water level indications
d
Heating element
j
Power socket
e
Main body
k
Cooker base
f
Steam vent cap
Controls overview (g. 3)
l
Display screen
q
Menu button
m
White button
r
Minute button
n
Keep-warm/Cancel
button
s
Preset time button
o
Cooking time button
t
Start button
p
Hour button
u
Brown rice button
5 Using the Rice cooker
Before rst use
1 Take out all the accessories from the inner pot.
Remove the packaging material of the inner pot.
2 Before rst use, boil water and clean the Rice cooker.
3 Clean the parts of the Rice cooker thoroughly before
using it for the rst time (see chapter “Cleaning and
Maintenance”).
Note
• Make sure all parts are completely dry before you
start using the Rice cooker.
Cooking rice
Cooking
function
Estimated
cooking time
Time
regulation
Preset
time
White(Nasi
Putih)
1 hour / 1-24 hours
Brown
(Nasi Merah)
2 hours / 1-24 hours
Fask cook
(Masak Cepat)
25 minutes
/
1-24 hours
You can cook rice using the White, Brown or fask cook
function.
1 Measure rice using the measuring cup provided.
2 Rinse rice, and put the washed rice in the inner pot.
3 Add water to the level indicated on the scale inside
the inner pot that corresponds to the number of cups
of rice used. Then smooth the rice surface.
» For instance, if you cook 4 cups of rice, add water
up to the 4-cup level indicated on the scale.
Note
• The level marked inside the inner pot is just an
indication. You can always adjust the water level for
dierent types of grains and your own preference.
• Besides following the water level indications, you may
also add rice and water at 1:1-1.2 ratio for rice cooking.
• Do not exceed the volume indicated or exceed
the maximum water level, as this may cause the
appliance to overow.
• For the fast cooking with a large amount of rice, it's
recommended to open the lid after 10-15 minutes
to make sure the optimal taste and cooking result.
4 Wipe o water outside of the inner pot and put it into
the appliance.
Note
• Make sure that the outside of the inner pot is dry
and clean, and that there is no foreign residue on
the inside of the appliance.
5 Close the lid (g. 4), and put the plug in the power
socket (g. 5), and switch on the appliance.
6 Press the White(Nasi Putih) or Brown(Nasi Merah)
button (g. 6), or select the Fast cook(Masak Cepat)
function by pressing the menu button (Menu) (g. 7).
7 Press the start button (Start) to start cooking (g. 8).
8 When the cooking is nished, you will hear 4 beeps
and the selected cooking function light will be o.
9 The Rice cooker will be in keep-warm mode
automatically.
» The keep-warm indicator lights up.
Note
• If the voltage is unstable at the area you live, it is
possible that the Rice cooker overows.
• After the cooking is nished, stir the rice and loosen
it immediately to release excessive moisture for
uy rice.
• Depending on the cooking conditions, the bottom
portion of the rice may become slightly browned.
• Please stir rice after cooking, and you are
recommended to consume it right after cooking for
best nutrition and best taste. If you would like to keep
rice for long hours and for many meals, it is best to
keep rice in sealed plastic containers and keep them
in the refrigerator and reheat it to avoid nutrient loss.
• If you want / need to change selection, you
rst need to press the “Keep warm/ Cancel”
(Menghangatkan/Cancel) button.
Cooking porridge/Slow cook
Cooking
function
Estimated
cooking time
Time
regulation
Preset time
Porridge
(Bubur)
2 hours 1-4 hours 1-24 hours
Slow cook 4 hours 3-10 hours 1-24 hours
1 Put ingredients and water into the inner pot.
2 Follow steps 4 to 5 in “Cooking rice”.
Note
• Do not exceed the maximum water level indicated
in the inner pot, as this may cause the Rice cooker
to overow.
3 Select the porridge(Bubur) or slow cook function by
pressing the menu button (Menu) (g. 9) (g. 10).
4 Press the start button (Start) to start cooking (g. 8).
5 When the cooking is nished, you will hear 4 beeps
and the selected cooking function light will be o. The
Rice cooker will be in keep warm mode automatically.
» The keep-warm indicator lights up.
Note
• You can use the porridge function to steam food.
• You can use the slow cook function to stew food.
Soup
Cooking
function
Estimated
cooking time
Time
regulation
Preset
time
Soup(Sup) 2 hours 1-4 hours 1-24 hours
1 Put beans and water into the inner pot.
2 Follow steps 4 to 5 in “Cooking rice”.
Note
• Do not exceed the maximum water level indicated
in the inner pot, as this may cause the Rice cooker
to overow.
3 Select the Soup(Sup) function by pressing the menu
button (Menu) (g. 11).
4 Press the start button (Start) to start cooking (g. 8).
5 When the cooking is nished, you will hear 4 beeps
and the selected cooking function light will be o. The
Rice cooker will be in keep warm mode automatically.
» The keep-warm indicator lights up.
Steaming food
Cooking
function
Estimated
cooking time
Time
regulation
Preset time
Steam
(Kukus)
25 minutes
5-59
minutes
/
1 Measure a few cups of water with the measuring cup.
Note
• To avoid boil-dry, add 2 scales of water at least into
the inner pot.
2 Pour the water into the inner pot (g. 12).
3 Put the steam basket into the inner pot.
4 Put the food into the steam basket.
5 Follow steps 4 to 5 in “Cooking rice”.
Note
• Do not exceed the maximum water level indicated
in the inner pot, as this may cause the Rice cooker
to overow.
• Add 5 cups of water at least to the inner pot when
using the Steam function.
6 Select the Steam(Kukus) function by pressing the
menu button (Menu) (g. 13).
7 Press the start button (Start) to start cooking (g. 8).
8 When the cooking is nished, you will hear 4 beeps
and the selected cooking function light will be o. The
Rice cooker will be in keep warm mode automatically.
» The keep-warm indicator lights up.
Cake
Cooking
function
Estimated
cooking time
Time
regulation
Preset time
Cake(Kue) 45 minutes / /
1 Whisk the ingredients for cake well.
2 Coat the inner pot with some butter or cooking oil
(g. 14), and then pour the cake mixture into it (g. 15).
3 Follow steps 5 and 6 in “Cooking rice”.
4 Select the Cake function (Kue) by pressing the menu
button (Menu) (g. 16).
5 Press the start button (Start) to start cooking (g. 8).
6 When the cooking is nished, you will hear 4 beeps
and the selected cooking function light will be o. The
Rice cooker will be in keep warm mode automatically.
» The keep-warm indicator lights up.
7 Open the lid and carefully take out the inner pot to
cool down.
8 After the inner pot is cool down, put a plate or cake
rack on top of the pot, and then ip over to take the
cake out.
Note
• Use a kitchen glove or a cloth, as the plate will be
very hot.
• You can cook rice while steaming food. Do not
exceed the volume indicated, as this may cause the
Rice cooker to overow.
• You can adjust the water level as needed.
How to cook cakes
1 Preparation of raw material:
Small quantity: 3 eggs, 100g white sugar (about 2/3
cup), 100g cake powder (about 1 cup), 50g butter
(about 1/3 cup), 18g milk (about 1/10 cup)
Large quantity: 5 eggs, 180g white sugar (about 1 cup),
180g cake powder (about 2 cups), 80g butter (about
2/3 cup), 36g milk (about 1/5 cup)
Note
• The user may adjust the raw material proportion as
per personal tastes.
• Do not put in too much raw material, or the quality
will be aected and even underdone.
2 Mix round white sugar with egg, till the bubbles appear.
Note
• If the temperature of egg is too low, the user may
use insulated water of 40°C to warm it. The cake
made will be soft, loose and elastic.
• Whisk the egg, till the egg material ows down the
egg whisk as silk.
• The vessel and egg whisk must be clean, if they
have oil, the bubbles will be dicult to appear.
• Do not whisk the egg in the inner pot, to avoid
scratching the nonstick coating.
3 Add cake powder, and averagely mix them round by
a wooden spoon.
Note
• Whisk the wooden spoon so as to fully mix the
material round.
4 Add milk and melted butter, quickly mix them round.
Note
• Melt the butter into liquid by insulated warm water.
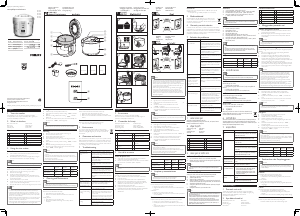
Adjusting the cooking time
You can set the cooking time for some menus. Refer to
the cooking time table in each chapter for the detailed
regulating range.
1 Choose the function you need.
2 To set a dierent cooking time, press the cooking
time button (Waktu Masak) (g. 17), and the default
cooking time starts ashing on the display.
3 Press the hour button (Jam) to set the hour unit
(g. 18).
4 After the hour unit is set, wait for a few seconds
before the hour unit is conrmed, and the minute
unit starts ashing on the display.
5 Press the minute button (Menit) to set the minute
unit (g. 18).
6 Press the start button to conrm the cooking time
and start the cooking process.
Note
• You can adjust the cooking time only in the
Porridge(Bubur), Soup(Sup) and Steam(Kukus) and
function.
Preset time for delayed cooking
You can preset the delayed cooking time for some menus.
The preset timer is available from 1 hour up to 24 hours.
Note
• The preset timer is not available in the Cake(Kue)
function.
• The cooking process will be nished by the time the
preset time has elapsed. If the preset time you set
is shorten than the cooking time, the appliance will
start the cooking process immediately.
1 Choose the function you need.
2 To preset time for delayed cooking, press the preset
time button (Atur Waktu), and the default preset time
starts ashing on the display (g. 19).
3 Press the hour button (Jam) to set the hour unit (g. 18).
4 After the hour unit is set, wait for a few seconds
before the hour unit is conrmed, and the minute
unit starts ashing on the display.
5 Press the minute button (Menit) to set the minute
unit (g. 18).
6 Press the start button to conrm the preset timer and
start the cooking process.
6 Cleaning and Maintenance
Note
• Unplug the Rice cooker before starting to clean it.
• Wait until the Rice cooker has cooled down
suciently before cleaning it.
Interior
Inside of the top lid and the main body:
• Wipe with a damp cloth.
• Make sure to remove all the food residues stuck to
the Rice cooker.
Heating element:
• Wipe with a damp cloth.
• Remove food residues with a damp cloth.
PHILIPS
PENANAK NASI
HD4515
400W
220V 50-60Hz
Negara Pembuat: Cina
Diimpor oleh:
PT Philips Indonesia Commercial
Gedung Cibis Nine Lantai 10
Jl. T.B. Simatupang No. 2 RT. 001 RW. 005
Kel. Cilandak Timur, Kec. Pasar Minggu
Jakarta Selatan 12560
Indonesia
No. Reg.: I.21.PIC1.05709.1019


Join the conversation about this product
Here you can share what you think about the Philips HD4515 Rice Cooker. If you have a question, first carefully read the manual. Requesting a manual can be done by using our contact form.