Manual Easy Camp Richmond 400 Tent

Need a manual for your Easy Camp Richmond 400 Tent? Below you can view and download the PDF manual for free in English. This product currently has 7 frequently asked questions, 0 comments and has 0 votes. If this is not the manual you want, please contact us.

Is your product defective and the manual offers no solution? Go to a Repair Café for free repair services.

Manual

Loading…

A
EASYCAMP.COM
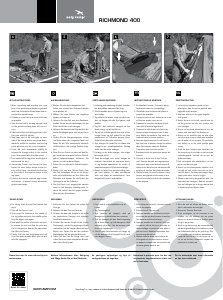
RICHMOND 400
Scan for video
Easy Camp
®
is a reg. trademark of Oase Outdoors ApS, Denmark, © 09/2013 Oase Outdoors ApS
NL
OPSTILLINGSVEJLEDNING
1. Undersøg ved udpakning af teltet, hvordan
det skal pakkes sammen efter brug.
2.
Find et område, der er så jævnt og rent
som muligt.
3. Tag teltet ud af posen, bred det ud på jor-
den, og fastgør alle alle re hjørner med
pløkker.
4. Tag fat i det midterste hængsel på den
første stang, og løft det lidt op.
5. Tag nu fat i teltstangen på hver side af den
orange knap, og tryk nedad for at folde
sektionerne ud, hvorefter benene bliver
yttet til den korrekte placering.
6. Tryk stangen let nedad for at udløse den
orange knap i samlingspunktet. Gentag
dette med de andre stænger.
7. Forlæng nu de seks stænger, som udgør
benene på teltet.
8. Træk termotaget over teltet, fastgør de
inderste velcrobånd til rammens hjørn-
er, og fastgør spænderne for enden af
spændestropperne til benenes stænger.
9. Placer nu teltet hvor det skal stå og fast-
gør med pløkker. Til sidst stormsikres
telte ved hjælp af bardunlinerne, som
fastgøres til jorden med pløkker.
NEDTAGNING
1. Start med at trække pløkkerne op af
jorden.
2. Tag Termotaget af
3. Tryk herefter på knappen midt på
stængerne og skub teltes ben sammen
4. Tryk på knappen på den første tagstang
for at åbne låsen, og fold stængerne adt
sammen på jorden. Gør det samme med
de øvrige tagstænger.
5. Fold til sidst teltet sammen på langs, og
rul det sammen til et kompakt bundt, som
kan lægges i tasken.
OPZETINSTRUCTIES
1. Let er bij het uitpakken goed op hoe
alles ligt en hoe de tent na gebruik weer
ingepakt moet worden.
2. Kies een schoon en zo egaal mogelijk
stuk grond.
3. Neem de tent uit de zak, spreid hem uit
op de grond en zet alle vier hoeken vast
met haringen.
4. Neem het centrale scharnierstuk van de
eerste stok vast en til het lichtjes op.
5. Neem nu de tentstok vast op elke zijde
van de oranje knop en druk naar beneden
om de delen uit te vouwen. De pootstok-
ken zullen nu in de juiste positie gaan
staan.
6. Druk de stok lichtjes naar beneden om
de oranje knop los te laten in het centrale
verbindingsstuk. Herhaal dit nu voor de
andere stokken.
7. Trek vervolgens alle pootstokken uit ter-
wijl u rond de tent gaat.
8. Neem nu de telescopische stokken voor
het dak en trek ze één voor één uit tot u
een klik hoort. De binnentent begint lang-
zaam maar zeker vorm te krijgen.
9. Plaats nu de tent op de gewenste plek. Zet
hem vast met haringen. Gebruik scheerli-
jnen en haringen om te zorgen dat de tent
in harde wind kan blijven staan.
UIT ELKAAR HALEN
1. Als u de tent uit elkaar wil halen, wervi-
jdert u als eerste de haringen.
2. Neem het Thermo Roof eraf
3. Druk vervolgens op de knoppen in het
midden van de stokken die als poten
dienen en duw de kleinere stokken weer
terug in de grotere.
4.
Druk nu op de knop op de eerste dakstok
om de vergrendeling los te maken en vouw
de stokkensets plat op de grond op. Doe
nu hetzelfde met de andere dakstokken.
5. Vouw de tent tot slot in de lengte op en
rol ze op tot een compacte bundel die
opnieuw in de zak past.
INSTRUCTIONS DE MONTAGE
1. En déballant la tente, il convient de se
familiariser avec son réemballage.
2.
Choisissez une surface aussi plane et
propre que possible.
3. Sortez la tente du sac, étalez-la sur le sol
et fi xez les quatre coins au sol.
4. Saisissez la charnière centrale du pre-
mier mât et levez-la légèrement.
5. Saisissez le mât de part et d’autre du
bouton orange et appuyez vers le bas
pour déplier les sections. Les pieds se
mettront dans la bonne position.
6. Appuyez légèrement sur le mât vers le
bas pour que le bouton orange se relâche
dans l’articulation centrale. Répétez
l’opération avec les autres mâts.
7. Étendez ensuite les pieds tout autour de
la tente.
8. Couvrez la tente avec le toit Thermo
roof, fi xez les bandes auto-agrippantes
intérieures aux coins de la structure et
attachez les boucles aux extrémités des
sangles de tension aux pieds des mâts.
9. Placez la tente où vous le désirez. Fixez-
la avec des piquets et sécurisez la tent
contre les vents forts avec des haubans
et des piquets.
DÉMONTAGE
1. Pour démonter la tente, commencez par
retirer les piquets.
2. Enlevez le toit Thermo roof
3. Appuyez ensuite sur les boutons situés
au milieu des pieds et inserez la section
ne dans la section plus large.
4. Appuyez ensuite sur le bouton situé sur
le premier mât de toit pour procéder au
verrouillage et posez les mâts pliés à
plat sur le sol. Répétez l’opération pour
les autres mâts de toit.
5. Repliez enfi n la tente dans le sens de
la longueur et enroulez-la pour former
un paquet compact que vous pouvez de
nouveau glisser dans le sac.
FR
Please turn over for more info and tips on
maintenance.
Weitere Informationen über Reinigung
und Pfl ege fi nden Sie auf der Rückseite.
Se yderligere oplysninger og tips til
vedligeholdelse på bagsiden.
Retournez la présente pour lire des ren-
seignements supplémentaires et des con-
seils d’entretien.
Zie de achterzijde voor meer informatie
en tips over onderhoud.
SET-UP INSTRUCTIONS
1. When unpacking and erecting your new
tent, it is a good idea to famliarise yourself
with how it should be folded down and re-
packed the opposite way.
2. Choose an area that is as even and clean
as possible.
3. Take the tent out of the bag, spread it out
on the ground and peg down all four cor-
ners.
4. Take hold of the central hinge piece on the
rst pole and lift it slightly.
5. Now take hold of the tent pole on each
side of the orange button and press down-
wards to unfold the sections, and the leg
poles will move into the correct position.
6. Press the pole downwards slightly to
release the orange button in the central
joint. Now repeat with the other poles.
7. Then extend all the leg poles, working your
way around the tent.
8. Spread the Thermo roof across the tent,
fasten the inner Velcro straps to the cor-
ners of the frame, and attach the buckles
at the ends of the tension straps to the
leg poles.
9. Position the tent as required, peg it down
and secure it against strong winds with
guylines and pegs.
TAKING DOWN
1. For taking down the tent rst remove the
pegs.
2. Take off the Thermo roof.
3. Then push the buttons at the middle of
the leg poles and push the smaller poles
into the bigger ones again.
4. Now push the button of the fi rst roof pole
to release the lock and fold the pole sets
at to the ground. Now do the same with
the other roof poles.
5. Finally, fold the tent lengthways and roll
it to a compact bundle which you can put
into the bag again.
AUFBAUANLEITUNG
1. Merken Sie sich beim Auspacken des
Zeltes, wie es nach dem Gebrauch wieder
zu verpacken ist.
2. Wählen Sie eine Fläche, die möglichst
sauber und eben ist.
3. Nehmen Sie das Zelt aus dem Packsack,
breiten Sie es aus und befestigen Sie die
Ecken des Bodens mit Heringen.
4. Nehmen Sie das zentrale Gelenkstück des
ersten Gestängebogens und heben Sie es
an.
5. Greifen Sie die Stangensegmente rechts
und links neben der orangenen Taste und
falten Sie die Teile auseinander wodurch
die Beinteile in die richtige Position klap-
pen.
6. Üben Sie nun Druck von oben auf den Bo-
gen aus bis die orangene Taste im Zentral-
gelenk herausschnappt. Verfahren Sie
ebenso mit den anderen Bögen.
7. Ziehen Sie nun die sechs Fußteile ausein-
ander
8. Breiten Sie nun das Thermo-Dach über
das Zelt, befestigen Sie es an der Innen-
seite mit Klettbändern an den Ecken des
Rahmens und klipsen Sie die Enden der
Spanngurte auf die Zeltbeine
9. Das Zelt kann nun ausgerichtet werden
bevor es mit Heringen befestigt wird. Si-
chern Sie zuletzt das Zelt gegen starken
Wind mit den Sturmleinen.
DER ABBAU
1. Entfernen Sie zum Abbau als erstes die
Heringe.
2. Nehmen Sie das Thermo-Dach ab.
3. Drücken Sie dann die Knöpfe in der mitte
der senkrechten Stangen und schieben
Sie diese zussammen.
4. Drücken Sie nun den Knopf auf der ersten
Dachstange, um die Verriegelung zu lösen
und breiten Sie die Stangen fl ach auf dem
Boden aus. Gehen Sie bei den anderen
Dachstangen auf die gleiche Weise vor.
5. Falten Sie das Zelt der Länge nach und
rollen Sie es zu einem kompakten Bündel,
das in den Beutel passt.
4 5 6 7
Download manual in English (PDF, 3.03 MB)
(Consider the environment and only print this manual if it is really necessary)

Loading…

Rating

Let us know what you think about the Easy Camp Richmond 400 Tent by leaving a product rating. Want to share your experiences with this product or ask a question? Please leave a comment at the bottom of the page.
Are you satisfied with the Easy Camp Richmond 400 Tent?
Yes No
Be the first to rate this product
0 votes

Join the conversation about this product

Here you can share what you think about the Easy Camp Richmond 400 Tent. If you have a question, first carefully read the manual. Requesting a manual can be done by using our contact form.

More about this manual

We understand that it’s nice to have a paper manual for your Easy Camp Richmond 400 Tent. You can always download the manual from our website and print it yourself. If you would like to have an original manual, we recommend you contact Easy Camp. They might be able to provide an original manual. Are you looking for the manual of your Easy Camp Richmond 400 Tent in a different language? Choose your preferred language on our homepage and search for the model number to see if we have it available.

Specifications

Brand Easy Camp
Model Richmond 400
Category Tents
File type PDF
File size 3.03 MB

All manuals for Easy Camp Tents
More manuals of Tents

Frequently Asked Questions about Easy Camp Richmond 400 Tent

Our support team searches for useful product information and answers to frequently asked questions. If you find an inaccuracy in our frequently asked questions, please let us know by using our contact form.

Can I store my tent when it's wet? Verified

Only for very short periods of time. When a tent is stored while wet for a week or longer, it can get moldy. This is harmful for your tent and possibly your health.

This was helpful (384) Read more

How do I impregnate a tent? Verified

Pitch the tent, clean the cloth and let it dry. Apply the impregnation agent on the cloth with a plant sprayer or other spray. It is also possible to use a paint roller or brush. The cloth needs to be fully saturated with the impregnation agent. Also treat the inside of the tent. Thoroughly clean any windows with a moist cloth. Do not let the impregnation agent dry on it. Let the tent cloth fully dry. Repeat the treatment if needed.

This was helpful (285) Read more

Can I repair a tear or hole in the canvas of my tent myself? Verified

There are special pieces of self-adhesive patches of cloth available for synthetic tent canvases. Stick one of these patches on both sides of the hole or tear. For cotton tent canvases or mixed material tent canvases it's best to use patches that can be ironed on. This will require an iron.

This was helpful (218) Read more

The zipper of my tent won't run smoothly, what can I do? Verified

When a zipper is running smoothly, use a dry PTFE spray or silicone spray. Do not spray onto the cloth and preventively spray to prevent future problems.

This was helpful (156) Read more

There are water drops on the inside of the tent, does this mean it is leaking? Verified

No, this is probably condensation. Make sure the tent is properly ventilated to keep condensation at a minimum.

This was helpful (129) Read more

What tent pegs are best to use for which surfaces? Verified

On grassland or forest surfaces you can use semi circular or plastic pegs. On rocky surfaces you need to use rock pegs. On clay surfaces you can use semi circular, plastic or universal pegs. On gravel surfaces you need semi circular or universal pegs and on sand you need to use wooden pegs.

This was helpful (105) Read more

The impregnation agent leaves white stains or a white haze on the tent cloth, what can I do about this? Verified

If the agent leaves a white haze or white stains on the tent cloth, this means you have applied more impregnation agent on those areas. This is not harmful and the stains often disappear over time. It is not advisable to use less impregnation agent to prevent stains. The cloth needs to be fully saturated with the impregnation agent to give good results.

This was helpful (97) Read more
Manual Easy Camp Richmond 400 Tent